Monday, September 29, 2014

Live Inspire Create Canvas - With DT Lisa

Hey everyone! It's Lisa here with you on this woooooonderful Monday. So, maybe it's not wonderful...YET! But, it will be. ;) My point is that I'm here with you to show you a fun way to take a funky little burlap canvas and make it into something really special for your home OR as a gift!


This canvas is 4 " W x 12" L. Kind of odd, but I LIKE it. ;) When I saw this in the store I knew I had to have it. I thought it would be perfect for mixed media! This was my first try using this new size and I love it!

I used the Bloom Girls Gardenia Stencil to create two flowers using acrylic paint and PanPastels. I then fussy cut them out and added Glaze on top to seal them and give them a little shine. Other pieces used are half of a previously used paper doily that I roughed up, some printed tissue paper, gold metal effects around the edges, LOTS of Prima pretty flowers, and Jamie's exclusive chipboard phrases, flair, and acrylic stamp. The metal effects looks like mustard in my photos (sorry), but it's really gorgeous in real life. Super shimmery and shiny! Chunky, too.

Here are some close ups:


Those stenciled flowers just turned out sooo cool! I really should have just filled up the canvas with a ton of those, shouldn't I? Next time, I promise. 

I hope that as you're filling up your shopping carts with all of your Bloom Girls goodies that you don't forget the stencils. They are very, very versatile! 

Supplies:
Wishes & Dreams – Gem Stones

PanPastels
Faber-Castell Design Memory Craft® Glaze, Gel Medium, Stamper’s Big Brush Pens
Doily
Printed Tissue Paper
Metal Effects


Thursday, September 25, 2014

Hair Fancies With Bloom Girl Stamps

Hello Everyone..It is me again, Jeannie with a fun tutorial for some hair sticks.
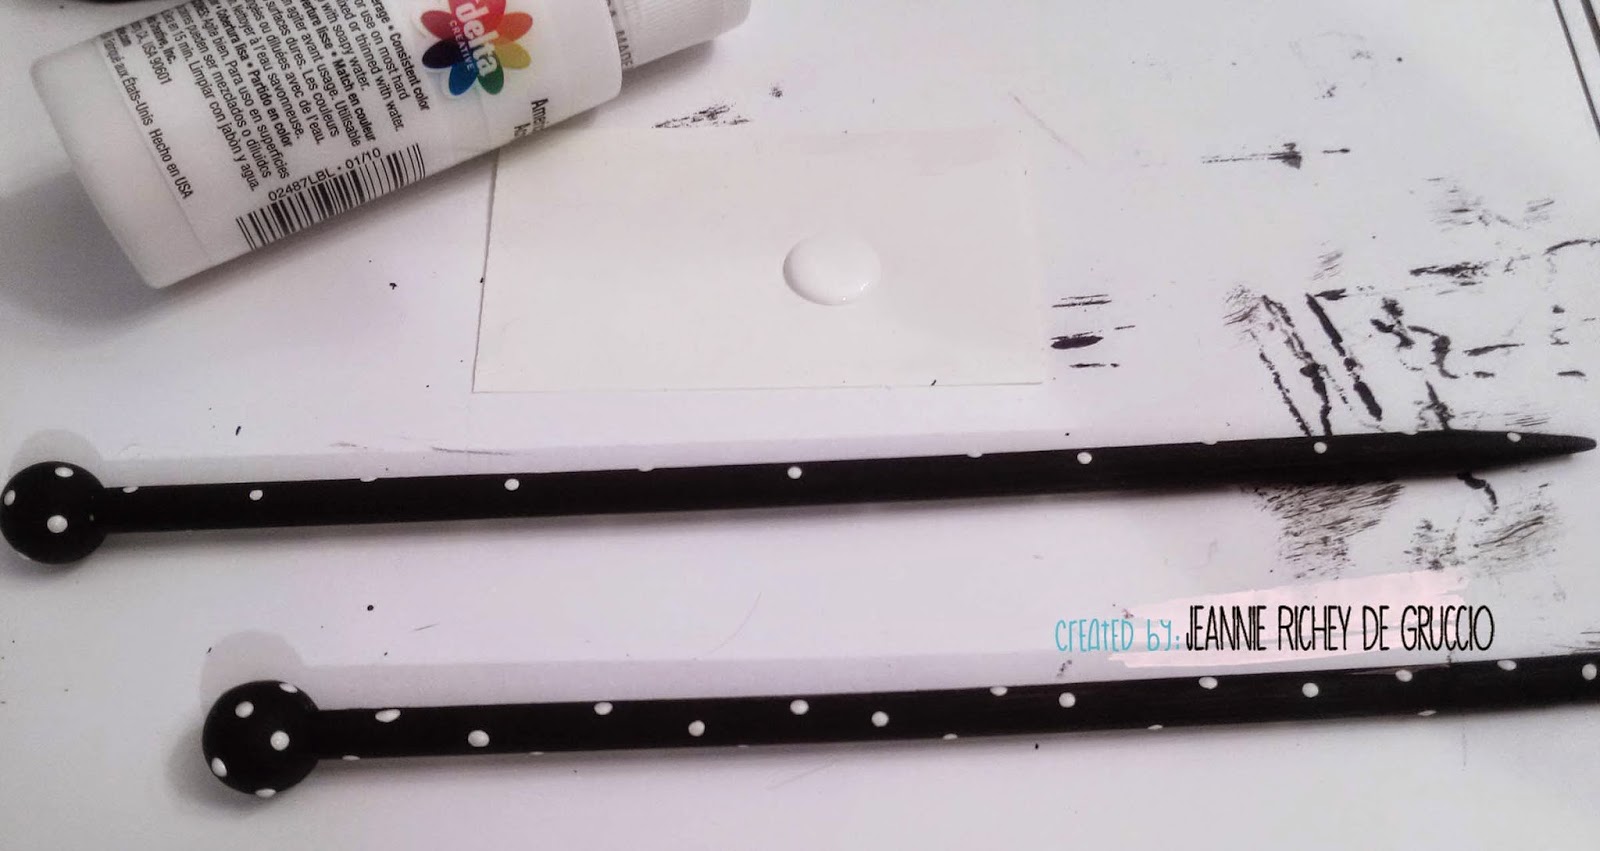
I started out with these adorable knitting sticks, that were useless, that came in a "Teach me to Knit" kit for kids.


I coated them with a quick layer or black paint.


If you know me at all, you know I have to have some Polka Dots somewhere.


Next, the charms for the sticks.  I used Matte Shrink Film.


You can see how the film is translucent.  I am using the Staz-On ink so I can use alcohol based markers. Also you have to use an in of this sort on Shrink Film.


I am using the Bloom Girl Joy stamp.

I stamped it 3 times so I could use one image and then the flowers from the other 2.


I am using the Bic Mark It pens. 


I learned the hard way, (I had forgotten) on the Matte Film, you need to color on the right side of the image. 
You can see, I colored on the wrong side, expecting the image to maintain it's translucency.  But I baked them, the plastic became opaque and you couldn't see any of my coloring through the front side,
Oh well!!!


To bake the Film, I use, 2 pieces of chipboard and 1 piece of vellum on a cookie sheet.


The colored side faces up on the layer of chipboard, then you cover that with vellum, then the remaining chipboard goes on top.  
The weight of the top piece of chipboard keeps the images from curling and sticking to each other.


After my images shrunk and I recolored them, I got ready to add the charms to the needles.
Using eye-pins, this is how I created the base to hang the charms from.


Using beads and jump-rings and other jewelry findings, this is how they turned out.


Here is how they look while in use.


I think they are super cute and just a touch of crazy fun!!


So there you have it.  I will definitely try the shrink film again, but this time I'll remember to use the clear or color the images digitally and print them out if I am using the Matte Film.

I hope you enjoyed my post today.  This has been Jeannie from The Polka Cabana with today's post.


Wednesday, September 24, 2014

Mixed Media with DT Janine using Bloom Girl Hope!

It's Janine Koczwara here again with today's post.  I always love to try new things and in that spirit I was intrigued to see how stamping onto printed tissue paper and then coloring the stamped Bloom Girl image would turn out.  I love the multi-layered effect I can achieve with tissue and wanted to combine it with my love of Bloom Girl stamps.

So the first step was to stamp "Hope" onto Tim Holtz tissue paper and then cut around the image.  I took a Ranger Kraft size 8 tag and swiped a touch of gesso onto the background before adding a slight touch of bloom spray.  Dried it off and then used Matte Medium to apply my stamped Bloom Girl tissue paper onto the tag before applying Faber Castell Gelatos and Big Brush Markers to color the image.  It was fun and created a different, more sheer look to the image.  You can still see the Tangerine Bloom Spray coming through the tissue from underneath.


Then it was onto creating a fun Mixed Media back ground for my stamped image.  I once again used the Bloom Watercolor Paper (yes I am in love with this stuff and have used several pads of paper already!)
I started by adding color onto the background with Color Bloom Sprays and a mop brush, watering it down at times for different intensities of the color.  After drying this off I masked with Prima Heavy Gesso through the Prima Random Circles mask and dried off again before adding more Bloom Spray for patches of greater intensity.

I then used the Prima Bloom Stamp that comes with the Flairs, to stamp different colored flowers with Prima Chalk Inks (Fall Leaf and Coldsfoot Petals), fussy cut around these and added embellished the page with these and Prima Bloom Flowers that have been altered using Bloom Sprays.


I had a lot of fun altering and experimenting on this page.  I would recommend having a play with stamping onto tissue, then using soft gel medium or matte medium to apply to your paper before coloring as  the sheer layers give so many opportunities for creativity.  If you do try this technique please share it on the Bloom Girls Creative Group on Facebook!

PRODUCTS USED:
980047 Prima Bloom Stamp Hope
9800269 Prima Bloom Watercolor Paper Pad
 980085 Prima Bloom Flairs
573065 Prima Bloom Clips
575182 Prima Bloom Flowers
846817 Prima Forever Green Garden Talk
846763 Prima Forever Green Watch Them Grow
960179 Prima 6x6 Checker Stencil
960445 Prima Bubbles Stencil
891299 Prima Chalk Coldsfood Petals
891282 Prima Chalk Fall Leaf
573935 Prima Bloom Spray Tangerine
573874 Prima Bloom Spray Sorbet
 961442 Prima Heavy Gesso
961428 Prima Soft Matte Gel
Ranger Tags Size 8 Kraft
Tim Holtz Tissue Paper
Tim Holtz Distress Ink Mustard Seed
Tim Holtz Distress Ink Ripe Persimon
Faber Castell Gelatos
Faber Castell Big Brush Markers
Stampendous Mish Mash Stamps
Luminarte Silks Solar Gold
Luminarte Polished Pigments Gold Dust
Sharpie White Paint Pen
Sharpie Black Pen




Monday, September 22, 2014

"Playing Pretty" - A Scrapbook Page by Jennifer Priest

Have you ever played "dress up" as a little girl? My daughter recently had a fun playdate with my niece where they played "make up" instead of "dress up". I know the Bloom Girl "Sharon" would be perfect for helping to capture this moment on a scrapbook page. The beauty of BloomGirls is that you can literally "make them up" however you like. Blue eye shadow and a bright red lip? Coming right up! This page captures the essence of "playing pretty".


Here's how I created this page start to finish:


Supplies:

  • Bloom Girl "Sharon"
  • Bloom Collection Prima Flowers- Sunkissed
  • Bloom Collection Brads
  • Bloom Collection A4 Watercolor Paper
  • Faber-Castell Gelatos
  • Faber-Castell Watercolor Pencils
  • ColorBox Pigment Ink in Black
  • DecoArt Media Misters
  • Black Acrylic Paint
  • Black Shimmer Cardstock, 12x12
  • White Cardstock
  • Adhesive
  • Gunmetal Glitter Paper
  • Paper Trimmer
  • Paint Brush
  • Water
  • Paper Towels
  • Heat Gun

Next time you find a cache of "dress up"or "playing make up" photos, consider using a Bloom Girl to help showcase the memory. Thank you for visiting today. For more from Jennifer Priest, check out http://hydrangeahippo.com


Friday, September 19, 2014

Bloom Girl Jing Canvas with DT Mindy!

 
Hello there my Bloom Girl Peeps!
 
It's Mindy here. I have a canvas to share with you. I have used Bloom Girl Jing. She's just gorgeous! Honestly I had no clue where this was going. I wanted it to be black and white.. then I thought I'd add pops of pink. Then somehow blue-green got in there! LOL!
 
I do love the way it came out though.
 
I have a coloring video I did on Coloring 980191 Bloom Girl Jing. I was hoping to have it up today. But -- Time has not allowed. So, next week it will have to be!


Supplies
 
Prima -980191 Bloom Girl Jing
Prima - 846572 Optimist 6x6
Prima - Bloom Brads
Prima - Bloom Collection Flowers/Roses
Prima - Bloom Chevron Stamp
The Crafters Workshop Stencil
Martha Stewart Butterfly Punch
Lili of the Valley - Script Background
Heidi Swapp Sticker 'Beautiful'


Wednesday, September 17, 2014

August Winner!!

I'm so sorry this is posted so late!
 
Thank you to everyone who participated in our first Bloom Girls Challenge!
You all really created some gorgeous projects.
 
We have chosen a winner to win a surprise pack from Jamie ..
 
...and the winner is....


2.Milagros C Rivera

Check out her gorgeous project!

 
Congratulations!
Please email BloomGirlCT@gmail.com to claim your prize!

Have a wonderful day.

Home Decor video tutorial with DT Stephanie


Hey everyone! DT Stephanie here, twice in the same week, yay!


Today I present you a video on how to turn a plain wooden frame into a stylish Home Decor project in a couple of easy steps! 


The tutorial : 


Thanks for watching! :)

Tuesday, September 16, 2014

Canvas Bag Tutorial with DT Stephanie

Hey everyone! DT Stephanie here!

 So how do you like to play with the canvas tote bag so far? Did you enter the contest yet?
If not, here's a fancy and simple way to make one, based on the bag you've seen on Prima's blog.


Supplies used : Canvas bag, Bloom Girl Sharon stencil, Elementals Rattan stencil, black paint, Color Bloom ink of your choice, sponge, light brush, water, E-6000 glue, ribbons, Elementals metal embellishments and flowers from Prima.

First, put a cardboard or something flat and strong inside the bag so you alter only one side of it.


Decide which stencil you'd like to use. I wanted to give an angelic look to this tote, so I went with the Sharon one.


With your sponge, gently dab some black paint on the stencil. Make sure the silhouette doesn't move!


Do the same thing by placing your next stencil on each side of your Bloom Girl.


With a light brush and some water, try applying Color Bloom ink along the edges of the silhouette, as if it was a graphic look. If your lines seem too bold, add more water and gently stretch the ink towards the center.


Add some ribbons from your stash on the handle for a little bohemian look.


Glue flowers and metal embellishments here and there, forming clusters.


VoilĂ ! So now make sure you enter the contest to win awesome PRIZES!