Showing posts with label Stephanie Beauchemin. Show all posts

Saturday, January 31, 2015

Tutorial : Quentin's calendar by DT Stephanie

Happy saturday Bloomies!

Oh yes, I did it again! Another tutorial, two in the same week :-) This time, we have our first Bloom Guy, Quentin, coloured with alcohol markers, on top of an homemade calendar with gold leaves and metal accents.


Here's how you can create the same at home/in store!


  1. Print a monthly calendar on 8½”x11” sheets.
  2. Cut 2 chipboards to the same size.
  3. Cover both with patterned papers cut to 12”x10”.
  4. Punch 3 holes on the top and add binder rings. That way you can always remove the past months and add others.
Decorating the cover:
1.      Place stencil over the cover part and apply clear crackle texture paste. Dry with heat tool if you want, but the crackles won’t appear as much as if you let it dry on its own.
2.      Meanwhile, stamp Quentin in light ink and colour him with your favourite medium.
3.      Fussy cut it. I decided to remove the gears part.
4.      Cut a piece of patterned paper to 7”x4¾”. Mat with cardstock. Do the same thing with a 6”x6” piece of different patterned paper.
5.      Put your favourite metal embellishments out and glue them together around Quentin.
6.      Stick everything on the dried cover.
7.      Select a couple of quotes that inspire you and place them around the stamp. You’re done!

Products used :
BRAND NEW! Bloom Guy Quentin stamp 
Time Traveler’s paper collection 12x12
Harlequin stencil by Finnabair
Texture paste – Clear Crackle
Metal vintage trinkets 960391, 961053, 961084
Prima Flowers 716462, 577285


Saturday, January 24, 2015

Altered bike frame tutorial with Lacie by DT Stephanie

Goooooood morning Bloomies!

SO, did you enjoy the sneak peeks of the Bloom Girls released at CHA?! Aren't Jamie's products just INCREDIBLE?!?! Ok I'm easy to convince on that, since I'm a huge fan of the Bloom Girls, and the possibilities are just endless with what's coming out. Today, I'll be showing you a quick altered project using a Prima Bike Frame, where our Bloom Girl Lacie is inserted! I swear you can do this at home very easy-peasy! And if you have any questions, feel free to tag me in the Bloom Girls Creative Group on Facebook!


Now, the steps...
  1. Stamp your image in light ink.
  2. Trace a circle with the help of a stencil and colour that part with your favourite colouring medium.
  3. Die-cut it and leave aside.
  4. Using the back of the altered bike frame wheel cardstock, trace that shape on a patterned paper.
  5. Add a lace sticker to the right of the shape.
  6. Pop up your coloured image on it with 3D foam dots and add metal embellishments here and there.
  7. Insert in the wheel frame.
  8. Using chalk ink and a stencil, ink a pair of wings on patterned paper. Fussy cut them and add with adhesive to the back of the frame.
  9. Ink all of the object’s edges.
  10. Add heavy white gesso with a stencil over some parts of the object. Dry with your heat tool.
  11. Stick up some flowers and you’re done!
Products used:
[Brand new!] Bloom Girl Lacie stamp 655350980320
[Brand new!] Wings stencil 980443  
Quick dry Fluid Chalk ink – Tin Can 891152
Altered Bike Frame 573720
Shabby Chic Treasures Garden fountain Resin 892463
Forever Green 6x6 paper pad 655350846954
Forever Green Wood Icons 576042
Prima Flowers 577766, 565992, 578701, 564490
Doily Lace Sticker 572341

Metal Vintage Trinkets 960339

Friday, December 26, 2014

Mixed Media altered frame with Gardenia by DT Stephanie

Good morning Bloomies!

Stephanie here on the blog today with a Christmas prezzie that went to one awesome gal! I try to go out of my comfort zone as often as possible, but sometimes it can go all wrong, like this AHAHAH...oh well, I'm still showing it to you guys!


So the idea was to turn a blank wooden frame (from Michael's) into a total mixed media madness gift. Knowing me, you all realize I couldn't pass the opportunity to put a Bloom Girl coloured in Copics on that, don't you?! Miss Gardenia here got stamped and coloured, then fussy cut to keep only a small section of her bust and hair. 

I inked the frame with a white Prima Chalk Edger (loooooove those cutie inks, so affordable and practical!), added some mold paste with a checkboard stencil, glued some lace and trimmings on half of it, and added several pieces of embellishments, all from my Prima stash box. Everything got a nice coat of heavy gesso from the Finnabair line and got dried with my heat tool. After that, I sprinkled a few pigment powders from Luminarte here and there, misted water over the whole thing and let dry on its own. As always, I put my Bloom Girl on foamy adhesive and VOILÀ!


Close-ups...


What about you, did you make some crafty gifts for Christmas? Come and show us on the Bloom Girls Creative Group on Facebook!

Wednesday, December 17, 2014

Fancy Christmas Tags by DT Stephanie

Good morning Bloomies!

Stephanie here on the blog today with another Christmas inspiration for you, gift tags! You might remember my video on how to make a Bloom Girl tag earlier in November (warning - french speaking eheh!), where I was already starting the background of two more tags. Well, here they are today!

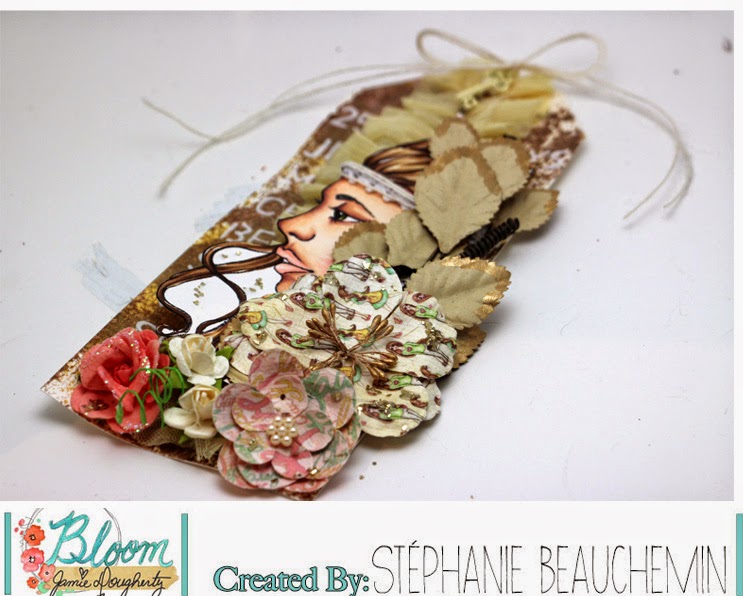
The first one was made with a watercolour paper tag absorbing all the ink from the Color Bloom sprays that was left on my teflon mat, then dried with a heat tool. I added some light paste through a stencil, letting it dry on its own this time to make sure it stays in shape. After that, I added a beautiful piece of Prima trimming in the middle, half-stamped Bloom Girl Free Spirit and coloured her with Copic markers. She was then put on 3D foam adhesive, got bloomed up with some gorgeous flowers and THAT'S IT! Quick and easy, right?!


The next tag was done with Bloom Girl Hope and approximately the same steps as the Free Spirit one, only this time when the light paste was fully dried, I added pinch of colour accents on it by dipping my brush into the Color Bloom spray bottles.


Thanks for visiting us today, and don't forget to check in on our Facebook group to see sneaks and many other fun things about the Bloom girls!

Thursday, November 20, 2014

Paige's Christmas mood by DT Stephanie

Good morning Bloomies!

Stephanie here on the blog today with another Christmas card inspiration for you! This was a tricky one, as I was challenged to use only Prima products, but I didn't have any holiday papers left :-S So I decided to put the focal point on the gorgeous Paige, stamped in Memento ink and coloured with Copic markers. 

You can also spot these items, all from Prima:

980054 Bloom Girl - Paige stamp
846961 6x6 Epiphany paperpad
576875 Jute Trim - Wheat
577018 Lace Trim - Cloud
577094 Weave Trim - Oatmeal
891084 Resist Chalk Edger - Branch Bark
577780 Paper leaves - Rodanthe - Neptune
911041 Mini Julie Nutting Dolls - Wood Embellishment and trim from the packaging

564674 Metal Paper Clip - Lifetime


So what do you think, are you going to try and give a Christmas mood to your own Bloom Girls?


REMINDER!!!

 OH and did you see?! Our sweet Jamie is having a dt call! Be sure to share your creation using the Bloom Girls products on our creative group, you never know if you might end up with an invitation from Jamie herself to be on the team, woohoo!!

Thanks for visiting us today, and don't forget to check in on our Facebook group to see sneaks and many other fun things about the Bloom girls.

Thursday, November 6, 2014

Bloom Girl Sharon in Christmas mode by DT Stephanie!

Hi everyone! 


Stephanie here on the blog today, again with a card BUT this time, there's a Christmas twist hidden somewhere with one of the Bloom Girls!


I decided to use Sharon and instead of leaving her butterflies in the open, I covered them with gorgeous flowers, wooden and metal embellishments, plus LOTS of yummy twine from Prima Marketing. Don't you think she looks full of joy? As always with my stamps, she's coloured with Copic markers, then fussy cut on some parts that are longer than my regular 5.5"x5." card shape, all edges inked. I'm very pleased with the way she turned out, and you'll definitely see more Bloom Girls on Christmas cards this month!


Thanks for visiting us today, and don't forget to check in on our Facebook group to see sneaks and many other fun things about the Bloom girls. OH and did you see?! Our sweet Jamie is having a dt call! Be sure to share your creation using the Bloom Girls products on our creative group, you never know if you might end up with an invitation from Jamie herself to be on the team, woohoo!!

Monday, October 20, 2014

Bloom Girl Gardenia card by DT Stephanie!

Hi everyone! 


Stephanie here on the blog today, again with a card that I especially love with one of the Bloom Girls!


I decided to use Gardenia and add a little doodle here and there to her, celebrating today's optimist vibe. Even if the stamp size can be a bit unusual for a 5.5" squared card, I wanted to keep her whole and the flowers are making her pop even more, don't you think? So our gal Gardenia got coloured with Copic markers, then fussy cut, all edges blackened, got pumped on 3D foam adhesives, along on the Optimist patterned papers and some pink flowers from Prima Marketing.


Thanks for visiting us today, and don't forget to check in on our Facebook group to see sneaks and many other fun things about the Bloom girls <3


Monday, October 6, 2014

Bloom Girl Hope card by DT Stephanie!

Hi everyone! 

Stephanie here on the blog today for a card with Bloom Girl Hope. She inspires me vision, and the concept of being open-minded to all that happens to you.

I stamped her twice, first on Xpress blend sheet and then on a patterned sheet from the gorgeous Cartographer line at Prima. The blank silhouette on Xpress paper got coloured with Copics markers (E000-00-21-11-04, R20, BV20-23-25-29, V91-95-99). I decided to cut the hair out of the Cartographer girl, leaving an opening for the flowers, and I traced the edges with black marker, then glued it on the first silhouette.

I also used other papers from the Cartographer collectionCartographer flowers, Cartographer flair, Ingvild Bolme resin frame from Prima Marketing, Tim Holtz long fasteners metal brads, Distrezz-it-all tool from Zutter.


Thanks for visiting us today, and don't forget to check in on our Facebook group to see sneaks and many other fun things about the Bloom girls <3


Wednesday, September 17, 2014

Home Decor video tutorial with DT Stephanie


Hey everyone! DT Stephanie here, twice in the same week, yay!


Today I present you a video on how to turn a plain wooden frame into a stylish Home Decor project in a couple of easy steps! 


The tutorial : 


Thanks for watching! :)

Tuesday, September 16, 2014

Canvas Bag Tutorial with DT Stephanie

Hey everyone! DT Stephanie here!

 So how do you like to play with the canvas tote bag so far? Did you enter the contest yet?
If not, here's a fancy and simple way to make one, based on the bag you've seen on Prima's blog.


Supplies used : Canvas bag, Bloom Girl Sharon stencil, Elementals Rattan stencil, black paint, Color Bloom ink of your choice, sponge, light brush, water, E-6000 glue, ribbons, Elementals metal embellishments and flowers from Prima.

First, put a cardboard or something flat and strong inside the bag so you alter only one side of it.


Decide which stencil you'd like to use. I wanted to give an angelic look to this tote, so I went with the Sharon one.


With your sponge, gently dab some black paint on the stencil. Make sure the silhouette doesn't move!


Do the same thing by placing your next stencil on each side of your Bloom Girl.


With a light brush and some water, try applying Color Bloom ink along the edges of the silhouette, as if it was a graphic look. If your lines seem too bold, add more water and gently stretch the ink towards the center.


Add some ribbons from your stash on the handle for a little bohemian look.


Glue flowers and metal embellishments here and there, forming clusters.


Voilà! So now make sure you enter the contest to win awesome PRIZES!

Friday, September 5, 2014

Bloom Girl Karlie card by DT Stephanie!

Hi everyone! 

Stephanie here on the blog today for a little back-to-school touch with Bloom Girl Karlie. I love that she has brushes and all kinds of things in her hair, with a sharp look saying "I've got a creative mind!". She can be pretty much any style you want, that's why she fits perfectly for a back-to-school themed card. I also used some papers from the School Memories collection, black chalkboard flowers, purple die and Mechanicals elements from Prima Marketing.


Thanks for visiting us today, and don't forget to check in on our Facebook group to see sneaks and many other fun things about the Bloom girls <3