Saturday, November 29, 2014

Mixed Media Portrait Paintings with Lisa Novogrodski


Supplies-

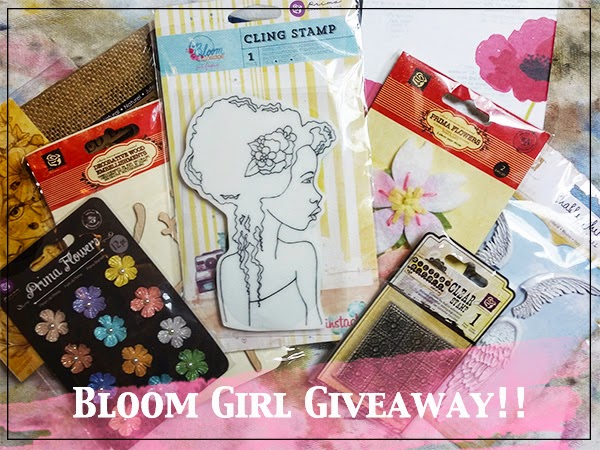
Bloom Girl “Sharon” Stencil

Bloom Girl “Free Spirit” Stencil

Color Bloom- Soft Teal

Color Bloom- Gold Foil

Prima Stamps- Stitch Stamps Circles


Hi Everyone! It’s Lisa Novogrodski  

here  again to share my final guest design project with you. I am sharing two portrait paintings I created with the Sharon and Free Spirit stencils! I’ve had a wonderful time creating with the Bloom Girls and want to thank Jamie for having me as her guest this month!


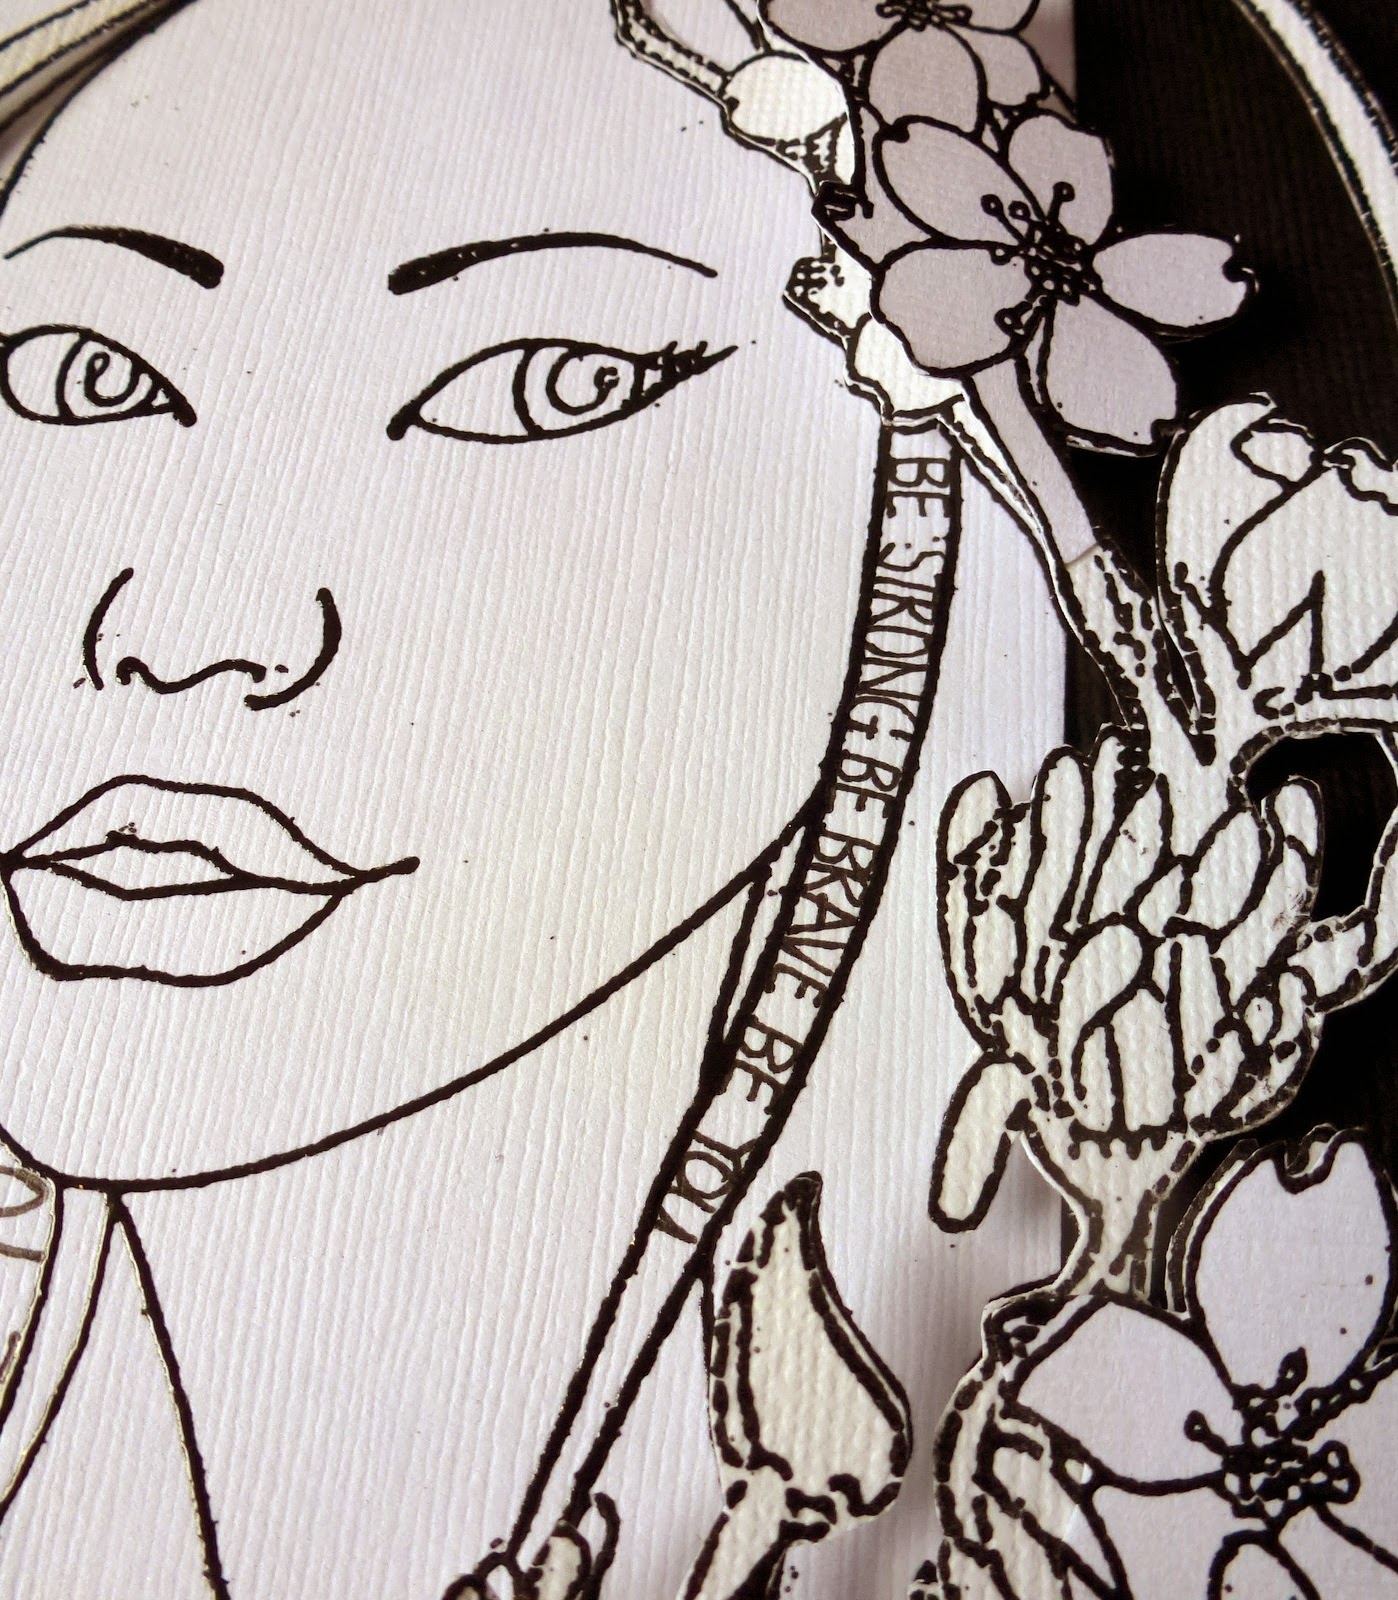
My first drawing was done with the Sharon stencil. I used only her face outlined in graphite and then enhanced with it for shading. I painted with acrylics and Caron D’ache water soluble crayons for detailing and the main coloring and shading of her face. The background was done with a mix of misting, a little bit of stencils and ink and some random stamping. Both of my projects were created on water color paper.


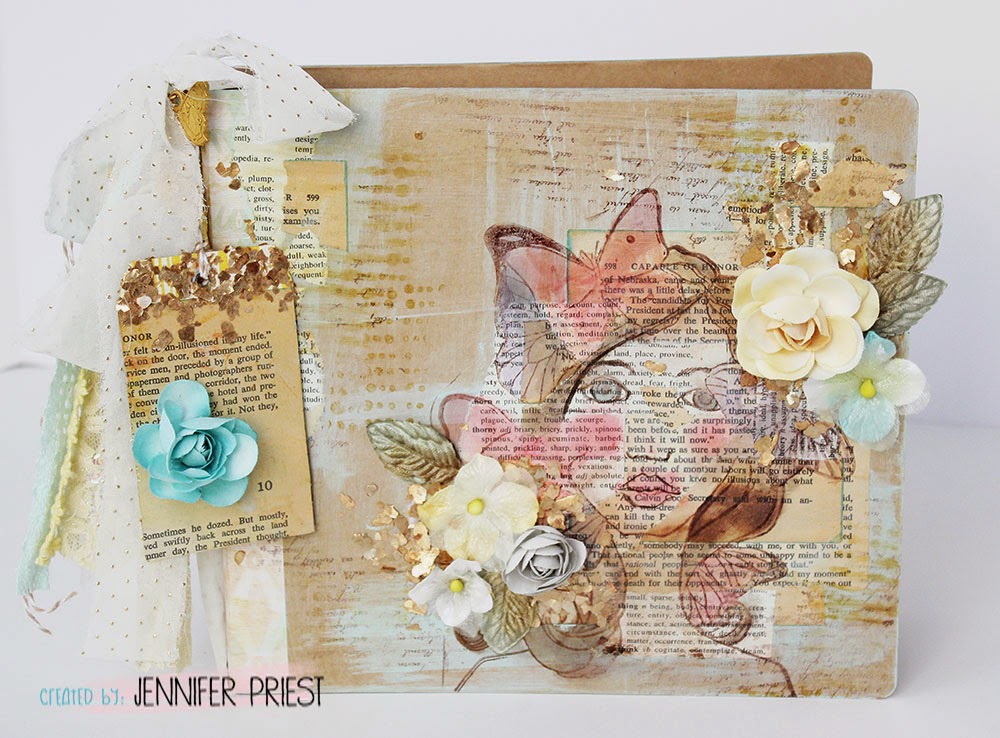
My second drawing was done with both the Sharon and Free Spirit stencils. I drew my face using Sharon stencil so it was still front facing but slightly tilted. I used the hair but selected the lines from the stencil I wanted to use to form a hairstyle that suited my needs. I slipped in some feathers from the Free Spirit stencil. I enjoy working with graphite and like to mix it in with my painting. I kept the feathers in the graphite and smudged them slightly. The rest of the piece was again colored with Caron D’ache water soluble crayons. I splattered some mists and did some random stamping but kept it subtle.

I used a mixed media background tearing up book pages and adhered them with gel medium. Finally I subtly stenciled with some modeling paste for more texture.


Friday, November 28, 2014

Christmas With Bloom Girl Hope

Today, I am showing off this gorgeous card I made with the Bloom Girl Hope stamp


Since it's Christmas Time, soon, I decided to put a Christmas spin on the card.


I made a little Santa Claus hat for her and made her dress look festive too.


Can you see the Christmas candies tucked here and there?


Using the Prima Mini Type letters and the Prima Cigar Box Secrets papers, I was able to finish this off.


I adore the way this all came out and will make another fun Christmas project to share for my next post.  
I hope everyone had a wonderful Thanksgiving.

This has been Jeannie from The Polka Cabana with today's Bloom Girl Design Team post. 

Thursday, November 27, 2014

Bloom Girl Gift Tags by DT Louise :) :) :)

Hello Hello Fellow Bloom Girl Fans :) :) :)

Today I would like to share with you some tags that I have created using the Instachic stamps and the newer release Jing cling stamp :)

First up I have creates 3 small gift tags ussing the fabulous Instachic range of cling stamps; Joy, Karlie & Paige.

I have heat embossed the stamped images with some lovely gold embossing powder, and also added a bit of dimension with some fussy cutting :)


This last tag is one I created for Prima Marketing to celebrate the birthday of the Prima Creative Director. I have again embossed the stamp image [Jing] and added dimension with some fussy cutting of the flowers, which extend off the edge of the tag :)


Well that is it from me for November, I do hope you are loving the Creative Teams Inspiration so far this month?!!!

Cheers and Happy Creating!

Tuesday, November 25, 2014

Mixed Media Bliss with Guest Bloom girl Zoey

Hello everyone!

It is me, Zoey again!! I am so happy to be able to share with you my last work using stamps from the Bloom Collection! 
I have to apologize because I do not have step-by-step picture , I was filming a video when I realized I wasn't recording at all. I hope I can still give you the idea on what I did!

Material Used: 
  • 6x4 ATC PAD Time Traveler's memories #814076
  • 6x6 PAPER PAD Time Traveler's memories #813932
  • 12x12 SCRIPT PAD #844417
  • Gardenia Bloom Girl Stamp #980207
  • Color Bloom Spray #573881 , #573829 , #573812 , #573805


I started with a plain white canvas and I glued some strip of papers here and there and then I covered the whole surface with a bit of gesso with a bit of water in it.
I did this because I wanted to tone down a little the paper but I didn't want to cover up the whole thing.  I then sprayed the surface using Bloom Sprays a huge mix of color!


When everything was completely dry I stamped the beautiful Gardenia Girl - I know I said it already in my last post (that you can read here) but what I love most about all the Bloom Girls is that light of hope I can see in their eyes, it is pure magic to me.


I stamped twice the rose on Gardenia's hair over a piece of paper, add some color to it and fussy cut it. I glued the pieces to the base using foam adhesive


I added some splashes of color here and there and also added some crackle paint to give more interest to the background.


The quote is a quote I found in the 6X4 ATC PAD (#814076) , all I did was cutting it down into stripes and distress them with the distressing tool. I love when I find pre-stamped quotes in my paper pads, makes it so easy to coordinate everything together.


And there is my finished canvas.  I hope I was able to give you an idea on how I achieved this result even without step by step photo or video.


I hope you will like the result, as always for any comments, questions, suggestions please leave a comment!
Stay happy, stay creative....till next time!
CIAO Zoey

Monday, November 24, 2014

Stamp Masking and Sketching with Janine

Hi it's Janine Koczwara here with a different way of combining Jamie Dougherty design genius!  I have signed up to do Jamie's Blooming Through The Seasons online workshop where she teachers you some of her awesome drawing and art journal magic each month via video tutorials.  They are absolutely fabulous and I have wanted to try drawing a couple of the flowers she has taught us how to do and what better way than combining it with one of the faces from her stamps!

So here  is the process I used to create this arty, mixed media card.

1.  Firstly I stamped the image directly onto normal printing paper and used my Prima Craft knife to cut out the face (on the outside of the facial lines of the stamp.
Then I used that paper over my stamp as a mask allowing me to ink up only the portion of the stamp I wanted. (It is important to clean the stamp thoroughly between the first step and the second step so it doesn't have ink residue on the rest of the stamp that you are not wanting to stamp.
2.  Next I stamped the masked image onto my bleedproof paper ready for colouring with Copics and Prisma pencils.

3.  Then came the biggest challenge for me!  Sketching in my own flowers, vine and birds.  Jamie's classes have taught me to push the boundaries of my comfort zone and try my hand at drawing.  I went back to her lesson video's and watched the flower drawing section of them over again to remind myself of what I had to do, then began to draw away.  For the birds I used a reference image off pinterest, and again used principles of circles and ovals (taught in previous lessons on face drawing by Jamie) to sketch in my little birds.

4.  Once the sketching was done, it was time to colour.  I used copics first to lay down skin and hair colour and went back in using Prisma Coloured pencils to add details and extra shading.


5.  Once that was complete it was on with creating a background for her to sit on.  Bleedproof paper and watercolour don't mix very well, so back to some intricate fussy cutting of the image!  Then creating the watercolour background on Jamies Fabulous Bloom Watercolour Paper.  Finally I matted it and an artistic mixed media card is complete.  As yet I have not added a sentiment as I often leave that to the last minute once I have decided who the card is for.


I hope this gives you an idea of another way to use Jamie's fabulous stamps and inspires you to take one of her online lessons.  Prior to November last year I would have thought I could only draw a stick figure and never would have dreamed I could draw a face or cute little birds and I owe it to Jamie's online classes for teaching me how to do these and give me the confidence to just try.

PRODUCTS USED:
Prima Bloom Stamp
Prima Bloom Watercolor Paper Pad
Copic Bleedproof Paper
Memento Black Ink
Copic Markers
Prisma Pencils
Stampendous Mish Mash Stamp
Prima Honeycomb Stamp
Prima Newsprint Stamp
Peerless Watercolours
Black Sharpie
White Sharpie
Arhival Ink Black, Sap Green and French Ultramarine
Cardstock

Friday, November 21, 2014

Merry Christmas 'Summer'.

Hi there my crafty peeps. Today I have a card to share using the 'Summer' Stamp and ironically I made a Christmas Card using her. That's just how versatile these gorgeous stamps are!
While at Michaels last week I found these berries and poinsettias and they are a little big but I knew they would be PERFECT with this image! I LOVE the way this card came out.
 
If you haven't gotten this gorgeous image yet we have a list of stores you can buy from HERE.
 
Have you seen the Bloom Girl Video Library? Tons of Bloom Girl Projects to check out.
 
Hope you all have a wonderful Day!
 
Hugs, Mindy


Thursday, November 20, 2014

Paige's Christmas mood by DT Stephanie

Good morning Bloomies!

Stephanie here on the blog today with another Christmas card inspiration for you! This was a tricky one, as I was challenged to use only Prima products, but I didn't have any holiday papers left :-S So I decided to put the focal point on the gorgeous Paige, stamped in Memento ink and coloured with Copic markers. 

You can also spot these items, all from Prima:

980054 Bloom Girl - Paige stamp
846961 6x6 Epiphany paperpad
576875 Jute Trim - Wheat
577018 Lace Trim - Cloud
577094 Weave Trim - Oatmeal
891084 Resist Chalk Edger - Branch Bark
577780 Paper leaves - Rodanthe - Neptune
911041 Mini Julie Nutting Dolls - Wood Embellishment and trim from the packaging

564674 Metal Paper Clip - Lifetime


So what do you think, are you going to try and give a Christmas mood to your own Bloom Girls?


REMINDER!!!

 OH and did you see?! Our sweet Jamie is having a dt call! Be sure to share your creation using the Bloom Girls products on our creative group, you never know if you might end up with an invitation from Jamie herself to be on the team, woohoo!!

Thanks for visiting us today, and don't forget to check in on our Facebook group to see sneaks and many other fun things about the Bloom girls.

Wednesday, November 19, 2014

We Have a Few Winners!!!

We have a few winner to announce! November has flown by and we seem to have a few prizes that need new owners :)


OCTOBER CHALLENGE WINNER


Congratulations Elena, please email me to claim your prize. jaylynnscraps@gmail.com


WESTCOTT BLOG HOP WINNERS!!!


The winner of the Westcott prize pack is 
What a great combination of products. The blog hop was wonderful, so many ideas. Thanks for supporting Breast Cancer Awareness.

Allison please contact me with your contact information... jaylynnscraps@gmail.com


The winner of our Bloom Girl prize pack is...

Laura Strack
Bloom Girl blog hop! Awesome!! Off to go see all the beautiful projects...
Laura please contact me to claim your prize :) 

Thank you everyone for joining us. We do apologize for keeping you all in limbo. 

Also I want to let you all know that we will be making a small shift in our posting location for blog posts. Starting in January we will be posting all of the Bloom Girl posts on my blog. www.jamiedoughertydesigns.blogspot.com

Hugs and Happy Creating
Jamie


Bloom Girl Art Book with GDT Lisa Novogrodski.

Hi Everyone! It’s Lisa Novogrodski here and I am thrilled to be guest designing this month for
Jamie Dougherty’s Bloom Girl Team!
I wanted to do something a little “out of the box” with the Bloom Girl stamps. If you are familiar with my work then you know I like to use products in a different way then they were intended. Nothing is safe. If I can cut it up, rearrange it and put it back together again that is what I’ll do! Soooo… today I want to show you that you are only limited by your imagination when it comes to these fabulous stamps. While you can stamp and color them and use them on your project you can also stamp and rearrange them into whatever path your imaginations takes you down.
 
“See The Beautiful Foolishness of Things and Linger”
 
I’ve used the Bloom Art Book to create my project. I love that the pages already have some color and pattern to them. No “blank page fear” if you happen to suffer from that.
 
 
I stamped the Bloom Girl Joy on white cardstock and cut the flowers from her hair…and well… I cut off her hair!  The stamped flowers were colored with Caran d’ache water soluble crayons which I love. I also stamped with Clear Stamps and the flower stamp that came with the pack of Flair Buttons. I splattered the background with Bloom Mists and added some art doll parts to the girls!
 
 
On the opposing page I used Bloom Girl Paige. Again I cut her hair off and stamped her on white cardstock. I also stamped her again several times on pattern paper. I cut the flowers out and used a mix of those cut from pattern paper and those cut from white cardstock.  I mixed them into background scene as well as forming a crown of flowers for her head. I used Caran d’ache to color her face and the white stamped florals.
 
 
I set my Bloom Girls in a scene adding some more art doll parts and background interest to give my pages a fun quirky look! Give it a try!
 
Products:

Bloom – Cling Stamp Paige
Bloom – Cling Stamp Joy
Bloom-Typewriter Keys
Bloom Art Book
Bloom- Clear Stamps
Bloom- Flair Buttons
Color Bloom- Soft Teal
Color Bloom – Cotton Candy

Tuesday, November 18, 2014

A BloomGirl Altered Scrapbook Album

The gorgeous kraft paper cover of the Bloom Collection album is just begging to be altered! It's literally a blank canvas that you can customize for any theme or person. I decided to try some of the new Finnabair Art Basics on the cover while using the BloomGirl stamp "Sharon" as the main attraction:


I used the tag from the product packaging to create a hang tag on the binding of the book, to which I tied strips of lace ribbon, and torn fabric. I decoupaged book and dictionary pages to the binder cover, using Prima's new Chalkboard paint to add color. I then stamped the BloomGirl Sharon onto the book pages using ColorBox Crafter's ink, which I heat set to make permanent. Without heating, the ink would run when touched with your hands or with a marker or paintbrush when coloring the image in.


I used Tombow markers to color the stamped image in, using my fingers to blend the ink. I added some stamping with stamp wheels and then hot glued the flowers to the cver. I added dabs of Art Basics Gel Medium to the area around the flowers and sprinkled that with Art Ingredients Mica Flake.


Watch this handy dandy video I made that shows the process from start to finish:


Easy peasy right? Instead of attaching the tag to  the book, you could also use it as a holiday gift tag. Make a bunch of them from your old clothing and product packaging!


Supplies:
  • BloomGirl Sharon Stamp
  • Bloom Collection Album
  • Prima Gold Butterfly Charm
  • Prima Art Basics Gel Medium
  • Prima Art Ingredients Mica Flake
  • Prima Chalkboard Paint - Egg Blue
  • Prima Flowers
  • Assorted Ribbon and Fabric Strips
  • Rolling Stamps
  • Colorbox Archival Dye Ink
  • ColorBox Crafter's Ink
  • Heat Gun
  • Hot Glue Gun
  • Vintage Book and Dictionary Pages
  • Twine
  • Tombow Markers
  • Foam Paint Brush
Consider stamping faces onto book pages to make them easier to color (you won't have to worry about coloring the skin). You could totally do this on canvas too!

Visit my blog at hydrangeahippo.com