Showing posts with label Bloom Girl Joy. Show all posts

Thursday, November 27, 2014

Bloom Girl Gift Tags by DT Louise :) :) :)

Hello Hello Fellow Bloom Girl Fans :) :) :)

Today I would like to share with you some tags that I have created using the Instachic stamps and the newer release Jing cling stamp :)

First up I have creates 3 small gift tags ussing the fabulous Instachic range of cling stamps; Joy, Karlie & Paige.

I have heat embossed the stamped images with some lovely gold embossing powder, and also added a bit of dimension with some fussy cutting :)


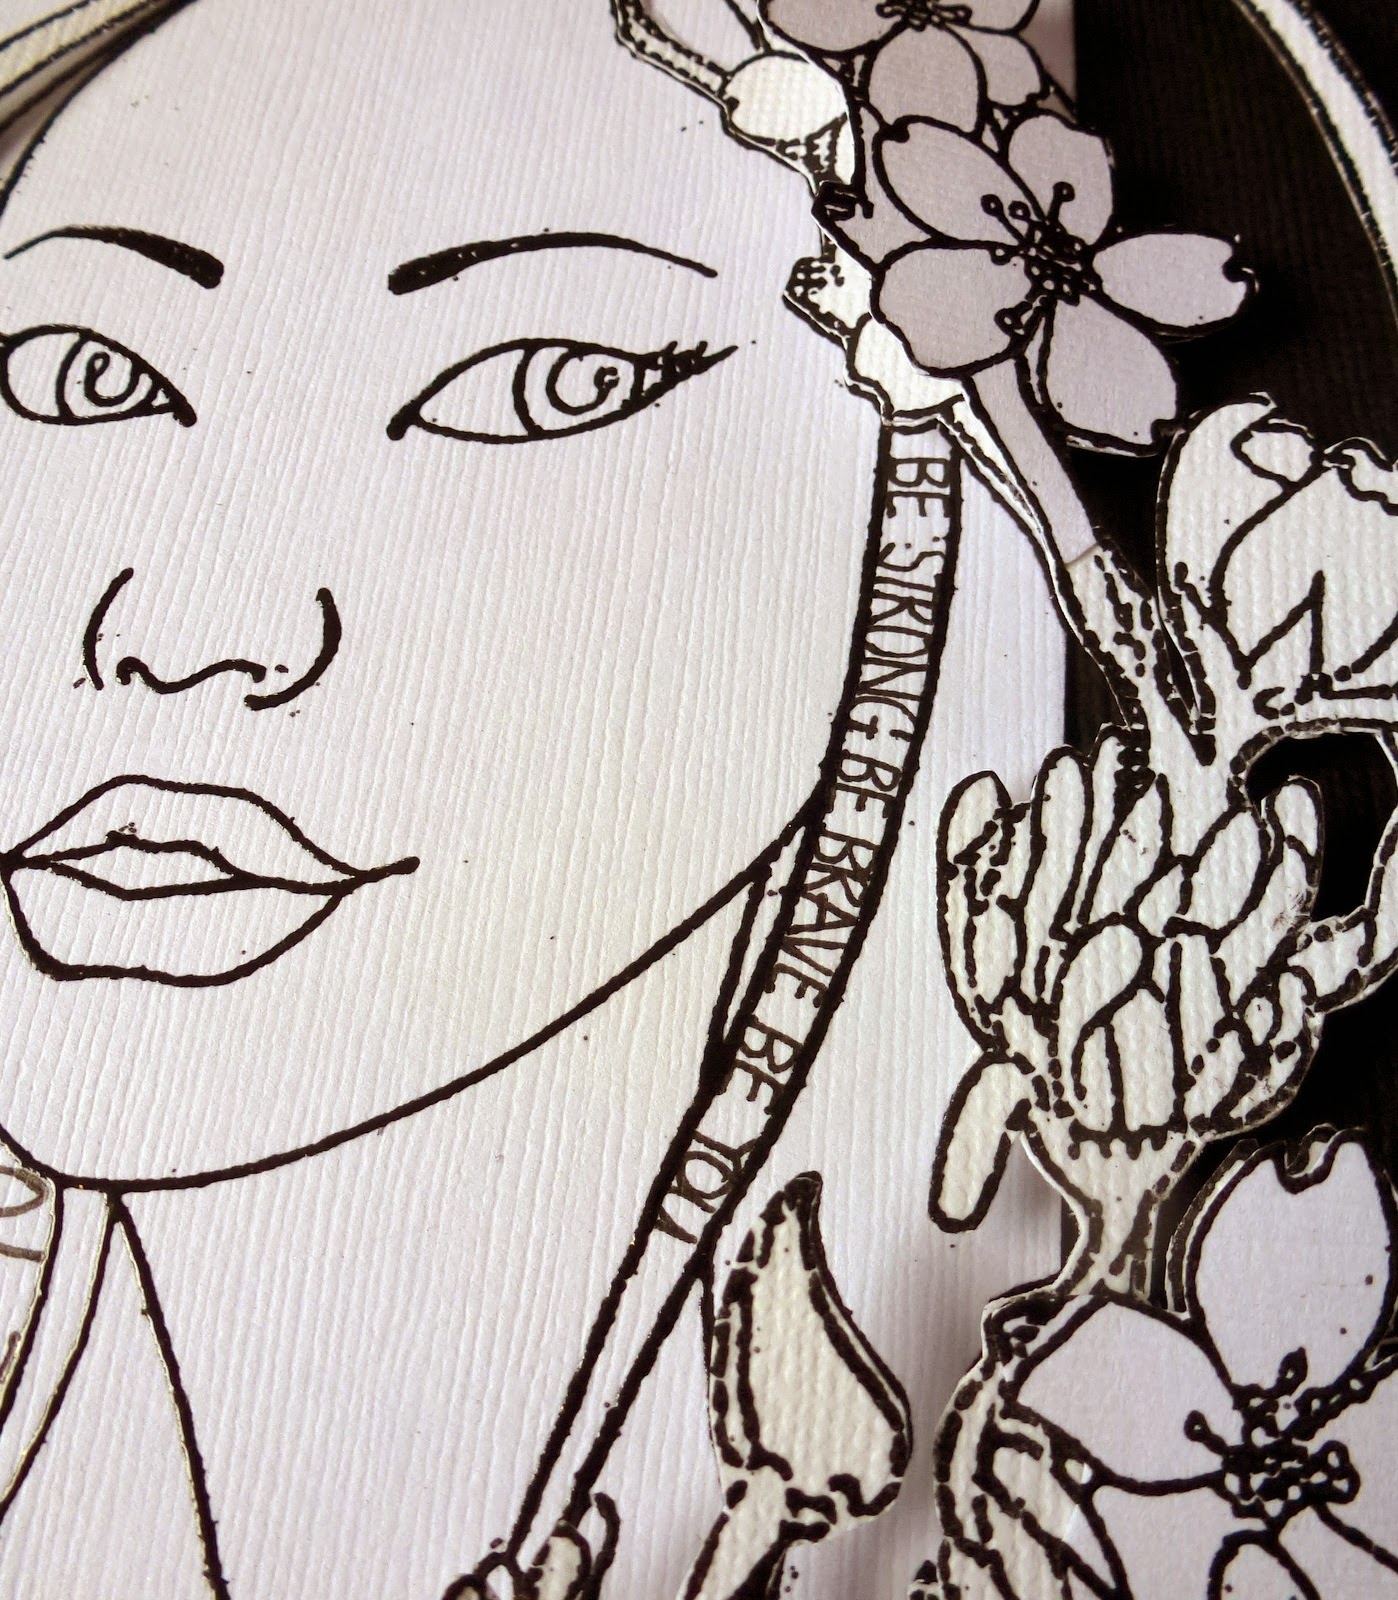
This last tag is one I created for Prima Marketing to celebrate the birthday of the Prima Creative Director. I have again embossed the stamp image [Jing] and added dimension with some fussy cutting of the flowers, which extend off the edge of the tag :)


Well that is it from me for November, I do hope you are loving the Creative Teams Inspiration so far this month?!!!

Cheers and Happy Creating!

Wednesday, November 19, 2014

Bloom Girl Art Book with GDT Lisa Novogrodski.

Hi Everyone! It’s Lisa Novogrodski here and I am thrilled to be guest designing this month for
Jamie Dougherty’s Bloom Girl Team!
I wanted to do something a little “out of the box” with the Bloom Girl stamps. If you are familiar with my work then you know I like to use products in a different way then they were intended. Nothing is safe. If I can cut it up, rearrange it and put it back together again that is what I’ll do! Soooo… today I want to show you that you are only limited by your imagination when it comes to these fabulous stamps. While you can stamp and color them and use them on your project you can also stamp and rearrange them into whatever path your imaginations takes you down.
 
“See The Beautiful Foolishness of Things and Linger”
 
I’ve used the Bloom Art Book to create my project. I love that the pages already have some color and pattern to them. No “blank page fear” if you happen to suffer from that.
 
 
I stamped the Bloom Girl Joy on white cardstock and cut the flowers from her hair…and well… I cut off her hair!  The stamped flowers were colored with Caran d’ache water soluble crayons which I love. I also stamped with Clear Stamps and the flower stamp that came with the pack of Flair Buttons. I splattered the background with Bloom Mists and added some art doll parts to the girls!
 
 
On the opposing page I used Bloom Girl Paige. Again I cut her hair off and stamped her on white cardstock. I also stamped her again several times on pattern paper. I cut the flowers out and used a mix of those cut from pattern paper and those cut from white cardstock.  I mixed them into background scene as well as forming a crown of flowers for her head. I used Caran d’ache to color her face and the white stamped florals.
 
 
I set my Bloom Girls in a scene adding some more art doll parts and background interest to give my pages a fun quirky look! Give it a try!
 
Products:

Bloom – Cling Stamp Paige
Bloom – Cling Stamp Joy
Bloom-Typewriter Keys
Bloom Art Book
Bloom- Clear Stamps
Bloom- Flair Buttons
Color Bloom- Soft Teal
Color Bloom – Cotton Candy

Tuesday, November 11, 2014

Welcome our Guest Designer Zoey!!!!

Hello beautiful people!
Zoey's here to bring you my very first post! We will make a Tag today, something that lately is something that I really enjoy doing!
I started off by coloring my background using Gelatos by Faber-Castell Design Memory Craft , I blended the color using my fingers and then I added some stamps using Prima Clear Stamps.


I kept adding texture to the background and then I finally stamped this amazing Bloom Girl : Hope.
I love that stamp. I love to imagine stories behind her eyes, I love to imagine what she is thinking right now and what she is looking at. I love daydreaming while I create, you will learn to know me! LOL. Anyway, after I stamped her with Archival Ink, I started adding colors.
I know nothing about coloring, but, I try to add a bit of color anyway to my creations!


 Here's a photo after few coloring steps. Yes I know, not perfect but...hey! Perfection is boring, right?! ehehe
As you might notice, I did not color the flower in her head -- you will know why in the next step!


I stamped again -- this time only the flower , and added more color. I used distress markers to color both Hope and the flowers. After coloring the flowers, I cut them in few pieces.
I will later add the flowers to create some dimension.


Since the background was not enough filled, I decided to use this Prima stencil (Orbs) and with the Faber-Castell Pitt Artist Pen in white, I colored the circles.


The only thing I did after the ink dried, I added few details, colored her eyes and lips and added stickers to create my sentiment.


I hope you will like the result, as always for any comments, questions, suggestions please leave a comment!
Stay happy , Stay creative... till next time!
CIAO Zoey

Thursday, September 25, 2014

Hair Fancies With Bloom Girl Stamps

Hello Everyone..It is me again, Jeannie with a fun tutorial for some hair sticks.
I started out with these adorable knitting sticks, that were useless, that came in a "Teach me to Knit" kit for kids.


I coated them with a quick layer or black paint.


If you know me at all, you know I have to have some Polka Dots somewhere.


Next, the charms for the sticks.  I used Matte Shrink Film.


You can see how the film is translucent.  I am using the Staz-On ink so I can use alcohol based markers. Also you have to use an in of this sort on Shrink Film.


I am using the Bloom Girl Joy stamp.

I stamped it 3 times so I could use one image and then the flowers from the other 2.


I am using the Bic Mark It pens. 


I learned the hard way, (I had forgotten) on the Matte Film, you need to color on the right side of the image. 
You can see, I colored on the wrong side, expecting the image to maintain it's translucency.  But I baked them, the plastic became opaque and you couldn't see any of my coloring through the front side,
Oh well!!!


To bake the Film, I use, 2 pieces of chipboard and 1 piece of vellum on a cookie sheet.


The colored side faces up on the layer of chipboard, then you cover that with vellum, then the remaining chipboard goes on top.  
The weight of the top piece of chipboard keeps the images from curling and sticking to each other.


After my images shrunk and I recolored them, I got ready to add the charms to the needles.
Using eye-pins, this is how I created the base to hang the charms from.


Using beads and jump-rings and other jewelry findings, this is how they turned out.


Here is how they look while in use.


I think they are super cute and just a touch of crazy fun!!


So there you have it.  I will definitely try the shrink film again, but this time I'll remember to use the clear or color the images digitally and print them out if I am using the Matte Film.

I hope you enjoyed my post today.  This has been Jeannie from The Polka Cabana with today's post.


Monday, September 8, 2014

Joy In Fall - Card by DT Lisa

Hi everyone! Happy Monday. :) It's Lisa here with on the blog and I have a card to share with you. So here's the card and then let me tell you a little bit about it:


I decided to use the September Challenge inspiration colors for my card. They're wonderful warm colors and really very versatile. I used Jamie's Joy Bloom Girl stamp for my main focal image and I stamped her using an embossing ink, then heat set it using a metallic copper embossing powder.

All of my coloring is done using PanPastels. Yep, ALL of it. I'm taking Jamie's PanPastel Online Workshop and it's amazing! I'm learning so much already, but I feel like I want to learn everything. Ha!!  Here's a close-up of her:


The stamp is just gorgeous and those PanPastels really make her come to life. I'm probably biased here. ;) All of the beautiful flowers and leaves are from Prima's Free Spirit - Flower Power and I added a few random sequins for interest along with a metal embellishment (Finnabair Mechanicals - Vintage Trinkets - Leaves 1) .

Thanks for stopping by the blog today and don't forget to stop by the Facebook page and play along in our challenges which you can always find off to the right.

Have a wonderful week!