Saturday, January 31, 2015

Tutorial : Quentin's calendar by DT Stephanie

Happy saturday Bloomies!

Oh yes, I did it again! Another tutorial, two in the same week :-) This time, we have our first Bloom Guy, Quentin, coloured with alcohol markers, on top of an homemade calendar with gold leaves and metal accents.


Here's how you can create the same at home/in store!


  1. Print a monthly calendar on 8½”x11” sheets.
  2. Cut 2 chipboards to the same size.
  3. Cover both with patterned papers cut to 12”x10”.
  4. Punch 3 holes on the top and add binder rings. That way you can always remove the past months and add others.
Decorating the cover:
1.      Place stencil over the cover part and apply clear crackle texture paste. Dry with heat tool if you want, but the crackles won’t appear as much as if you let it dry on its own.
2.      Meanwhile, stamp Quentin in light ink and colour him with your favourite medium.
3.      Fussy cut it. I decided to remove the gears part.
4.      Cut a piece of patterned paper to 7”x4¾”. Mat with cardstock. Do the same thing with a 6”x6” piece of different patterned paper.
5.      Put your favourite metal embellishments out and glue them together around Quentin.
6.      Stick everything on the dried cover.
7.      Select a couple of quotes that inspire you and place them around the stamp. You’re done!

Products used :
BRAND NEW! Bloom Guy Quentin stamp 
Time Traveler’s paper collection 12x12
Harlequin stencil by Finnabair
Texture paste – Clear Crackle
Metal vintage trinkets 960391, 961053, 961084
Prima Flowers 716462, 577285


Friday, January 30, 2015

Bloom Boy!! With Guest Courteney Gibson


Bloom Boy!!!!!!!!! Say what!?!?!? 

I am so excited for this! Jamie's NEW Bloom Boy "Quentin" is so very handsome! He's a steampunk dream with gears, bow tie, monocle and the alway fun moustache! Lol! He is seriously so fun to color!!! 


I decided to use a technique I learned a while back at a mixed media journal class. It's so cool, using a paper bag and a few of your brown distress ink pads. You crumple up your brown paper bag getting lots and lots of crumples in it! ( Is "crumples" a word?!?! Lol!) Then I un-crumple it, laying it back as flat as it can. I take my favourite brown distress ink pads I drag them across the bag. The distress inks pick up and highlights all the creases in the bag, once the ink has dried, I then take Glossy Gel Medium and paint your bag covering it all. This adds a glossy look making your paper bag look like leather. I love it. Next I grabbed a piece of Tin Foil from my pantry. That's right just plan regular Tin Foil, I cut a piece off the roll and put it inside an embossing folder pressing the folder closed the design gets pushed right into the tin foil. It works perfectly. Using a heavy gel medium I glued down my glossy paper bag onto a large tag and layering I glued down my tin foil on the bottom half of my tag. Then I just kept on layering, Prima's wood ATC's added some fun dimension. Sticking with the Steampunk theme I used Junkyard Findings clock faces, Ingvild Bolme's ceiling light bulbs and Jean plates. Prima really makes embellishing to much fun. Adding Glossy Accents to "Quentin's" monocle and bow just added the finishing touches! I hope you all enjoy this tag as much as I enjoyed making it!!!!! Xoxo


List of Products
980337- Bloom Boy Quentin
572952- Wood ATC-Classic Cards
57280- Time Traveler's Wood Icons
892210- Ingvild Bolme Jean Plates
892180- Ingvild Bolme Ceiling Light Bulbs
891596- Junkyard Findings Clock     Faces
573102- Cartographer Typewriter Keys
990138- Cartographer Flare Buttons

Courteney McMillan-Gibson


P.S. We will be moving the Bloom Girls over to Jamie's Designer blog starting Feb. 2nd!! There you will find all of the NEW Creative Team's designs along with special posts from Jamie herself. Join us there at 

http://jamiedoughertydesigns.blogspot.com

We hope to see you there. You won't want to miss all of the new stuff we have in store! 

Hugs and happy creating!! 


Sunday, January 25, 2015

Bloom Girl Lacie Layout :) :) :)

Hello Hello fellow Bloom Girl fans :) :) :)

Today I would like to share with some of my recent Bloom Girl creative fun with the fabulous new release Bloom Collection Stamps :)

First is a layout I have created using the fabulous new release Lacie cling stamp :) :) :)


Doesnt Lacie Just ROK?!!!!!

This is a mixed media project that I created for the Prima Marketing CHAW 2015 Bloom Collection new release. It features the wonderful Mother Cling Stamp.


Isnt she just a most fabulous Bloom Girl?!!!!

Well that is it from me for the mo, I do hope you are enjoying all of th fabulous inspiration byt the rest of the team this month!!!!!

Cheers and happy creating :)

Very Inspirations Layouts with GDT - Anita!

Back in July 2014, I was selected to be a Guest Designer for
Prima Marketing 'Bloom Girl'. Needless to say I was
THRILLED!!!!!
I couldn't believe it. So now it's January & my turn to share with you all my
projects I created :) :) *insert happy dance here.

Here's a bit about me:
"So you know you're an artist if you go through a glue stick faster than a lipstick!? Well that's me!! Hello, I'm Anita . Graphic Designer / Full-time mummy to one boisterous 3yr old boy (with no.2 on the way & enjoying every bit of it!!) & married to my best friend, Chris.
We live in Tamworth, the country music capital of Australia.

My love of art started at a young age & I had choosen my career path pretty early. I have always loved mixed media & the design process. Never shying away from getting my hands messy. I am lucky enough to say the quote “Do what you love, love what you do” applies to me. I started scrapbooking started about 10yrs ago & I haven't stoppped!! I have however since forgotten all the other basics like vacuuming, cooking etc - but we get by LOL. Paper & paint are like therapy to me! It calms me & satisfies my arty desires.

I have been on numerous Design & Creative Teams. I am currently designing for Flutterby Designs, 2Crafty Chipboard & Scrap the Boys. I’ve had layouts published in magazines such as Scrapbooking Memories, Scrapbook Creations & Jot Magazine. I have made many friends & met some awesomely talented people through scrapbooking, that inspire me everyday. I am truly grateful to have met them all.

'Be You Always'

 I LOVE to create my own backgrounds. I find it very expressive & calming
to start with a blank sheet. I primed my cardstock with gesso & stamp my
'summer' image using some archival ink. I then began adding my various
mediums to build up my layers. I used acrylic paint to add detail
& colour to my image. With a knife I cut along one side of the image
to allow me to slip my photo in under it. Then I finished off by layering flowers,


brads, thread, enamel dots & alphabets.
 PRODUCTS USED:
Bloom Collection - 'Summer' Cling Stamp
Bloom Collection - Brads
Bloom Collection - Paperclips
Bloom Collection - Flair buttons
Prima Marketing - Flowers

Prima Marketing - Color Bloom 'Gold' spray'Friends'
 I had a lot of fun making this one! I started off with some gel medium
& used my 'Free Spirit' stencil. Once that was dry, I put a white wash
of gesso over it to pick up the details. With mix of acrylic paints
& sprays I added in my colour. With a sewing machine & some
hand stitching I added a circular element to draw focus to the photo.
I've used lots of different things to build up my layers - old
book paper, paper doily, flowers, thread & even some of my
packaging from Prima products. I cut up strips of the teal
part of the packaging to create journaling strips.
To make the background image 'pop' a little bit, I used a fine black pen
& traced around the image.


PRODUCTS USED:

Bloom Collection - 'Free Spirit' stencil
Bloom Collection - Brads
Bloom Collection - Metal clips
 Prima Marketing - Flowers

'Don't Stop Creating...Ever'
Art Journal Page

 This was a quick & fun page to do some creative detoxing with.
I used some embossing ink, black embossing powder & Bloom Girl
stamp to start with & then began creating my background. I've used some
paint pens to add colour detail to the image & finished off with some
brush script.


 PRODUCTS USED:
Bloom Collection - Cling Mounted Stamp Two

Saturday, January 24, 2015

Altered bike frame tutorial with Lacie by DT Stephanie

Goooooood morning Bloomies!

SO, did you enjoy the sneak peeks of the Bloom Girls released at CHA?! Aren't Jamie's products just INCREDIBLE?!?! Ok I'm easy to convince on that, since I'm a huge fan of the Bloom Girls, and the possibilities are just endless with what's coming out. Today, I'll be showing you a quick altered project using a Prima Bike Frame, where our Bloom Girl Lacie is inserted! I swear you can do this at home very easy-peasy! And if you have any questions, feel free to tag me in the Bloom Girls Creative Group on Facebook!


Now, the steps...
  1. Stamp your image in light ink.
  2. Trace a circle with the help of a stencil and colour that part with your favourite colouring medium.
  3. Die-cut it and leave aside.
  4. Using the back of the altered bike frame wheel cardstock, trace that shape on a patterned paper.
  5. Add a lace sticker to the right of the shape.
  6. Pop up your coloured image on it with 3D foam dots and add metal embellishments here and there.
  7. Insert in the wheel frame.
  8. Using chalk ink and a stencil, ink a pair of wings on patterned paper. Fussy cut them and add with adhesive to the back of the frame.
  9. Ink all of the object’s edges.
  10. Add heavy white gesso with a stencil over some parts of the object. Dry with your heat tool.
  11. Stick up some flowers and you’re done!
Products used:
[Brand new!] Bloom Girl Lacie stamp 655350980320
[Brand new!] Wings stencil 980443  
Quick dry Fluid Chalk ink – Tin Can 891152
Altered Bike Frame 573720
Shabby Chic Treasures Garden fountain Resin 892463
Forever Green 6x6 paper pad 655350846954
Forever Green Wood Icons 576042
Prima Flowers 577766, 565992, 578701, 564490
Doily Lace Sticker 572341

Metal Vintage Trinkets 960339

Thursday, January 22, 2015

Fabulous Scrapbook page by GDT - Courteney!

Hey My Bloom Peeps! Courteney here! I had so much fun creating this layout. My beautiful nieces are to me what Bloom Girls are all about! Truly beautiful inside and out, sweet, strong & living there dreams.

I have to say Jamie's NEW Sirena Bloom Girl is my absolute favourite!!!!
I swear Jamie read my mind, I have wanted a Seashore Bloom Girl since I saw Jamie's stunning project she made for a Charity Wings advent. (I may have even begged her to buy it) Lol! So needless to say when I saw Sirena I may have jumped up and down flailing around like a fool!!!

Playing with many of my favourite Prima products, this layout was so fun to create. Using Prima's Seashore paper collection, chipboard and stamps. Gold Foil Bloom spray and alway beautiful Prima trims. I just couldn't stop. Using Jamie's NEW Criss-Cross Stencil and Heavy Matt Gel Medium I added some cool looking clear texture for my background, then I lightly sprayed Gold Foil BloomSpay over the dried medium for another layer of dimension. Coloring Jamie's NEW Floral stamps with watercolour pencil crayons and Wink of Stella pens to add some sparkle and some pearls with a pearl pen. Sirena I colored with copic markers and watercolour pencils crayons adding sparkle and glossy accents here and there. Popping layers on top of layers with pop dots adding dimension everywhere. I just love how it turned out and I hope you do to!!!


List of Prima Products
Jamie Dougherty's NEW Bloom Girl Sirena #980344
Jamie Dougherty's NEW Floral Stamp
#980313
Jamie Dougherty's NEW 6x12 Criss-Cross Stencil #980412
Seashore Collection paper #814144
Seashore Chipboard pieces #813727
Seashore Clear Stamps #572600
Trim #573379
Color Bloom Gold Foil #573805

Thanks everyone for stopping by!!!
Courteney McMillan-Gibson
https://poshcreates.wordpress.com

Monday, January 19, 2015

Paige Collage Canvas

Hi bloomies (it's okay if I call you that, isn't it?)! It's Lisa back with you and another project to share. I decided to make a collage canvas using the Paige Bloom Girl and show you my steps. Here is what I made:

She is soooo pretty, don't you agree? I don't think there's anything you could do to her to make her look ugly. Hahha!

Let's take a look at what I did to create her:

1. Start by gathering up the papers wanted to create the background. * I usually do a "dry fit" and take a pic with my iPhone.

2, Rub Gelatos® in various shades over canvas. This is just so that there is color peeking through any empty spots instead of white. Not a necessary step, but something I really like to do.

3. Using the "dry fit" photo adhere the papers to the canvas using Gel Medium. *Be sure to use a very dry brush (even though it will become wet in the Gel Medium) to prevent the Gelatos® from smearing, if used. Be certain to apply the Gel Medium both under the paper and on top. Either heat set or air dry. Once dry, trim off excess paper.

4. At "seams" of paper, apply either Gelatos®, PITT Artist Stampers Big Brush Pens, or other color medium.

5.  Place the Bubble Stencil over the background that is being created and using the Color Bloom Spray in Soft Teal and Tangerine and spray over the background. Tilt to drip (if desired). Dab off excess. Then take cap off Color Bloom Spray in Gold Foil and tap onto background. Spritz lightly with water to drip.

6. Add contrast to larger circles with PITT Artist Stampers Big Brush Pens. Blend with fingers.

7. Stamp Paige Bloom Girl onto white tissue paper using Coffee Archival Ink. * I like to use a piece of paper under the tissue paper and a foam mat under that to ensure even pressure of the stamp and a crisp image.

8.  Adhere the tissue paper Paige Bloom Girl onto the background again using Gel Medium. Heat set or allow to dry.

9. Begin to embellish as desired! I can't tell other people how to embellish a project. This is personal preference. (I used all PITT Artist Stamper's Big Brush Pens to color since they are highly blendable with your fingers.) Other items used: Prima Trim, Prima Flowers, rub-ons, and Faber-Castell Design Memory Craft® Texture Luxe & Texture Gems.

(You should be able to see the coloring in photo 9 start to take place.)

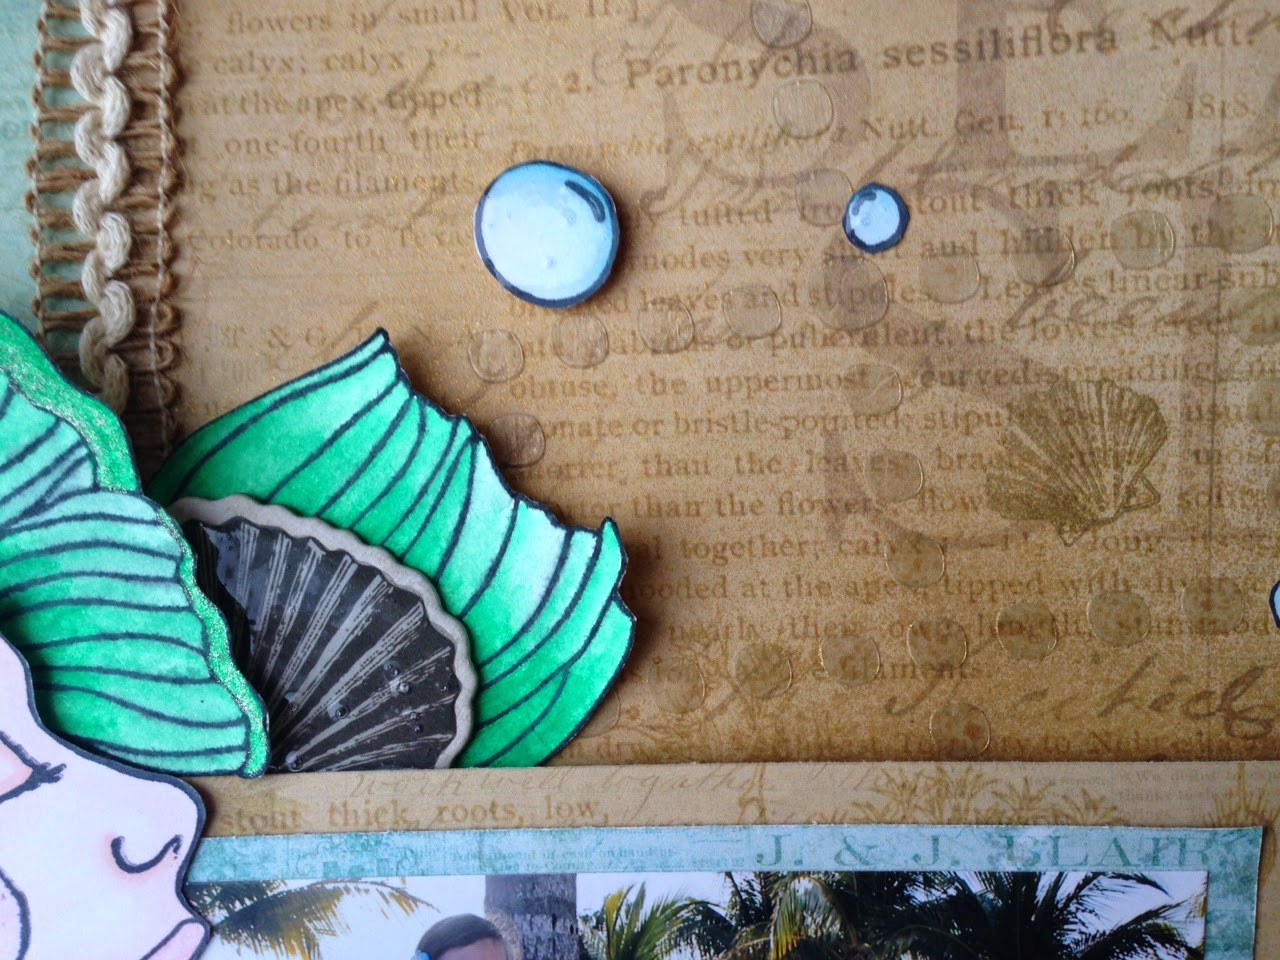
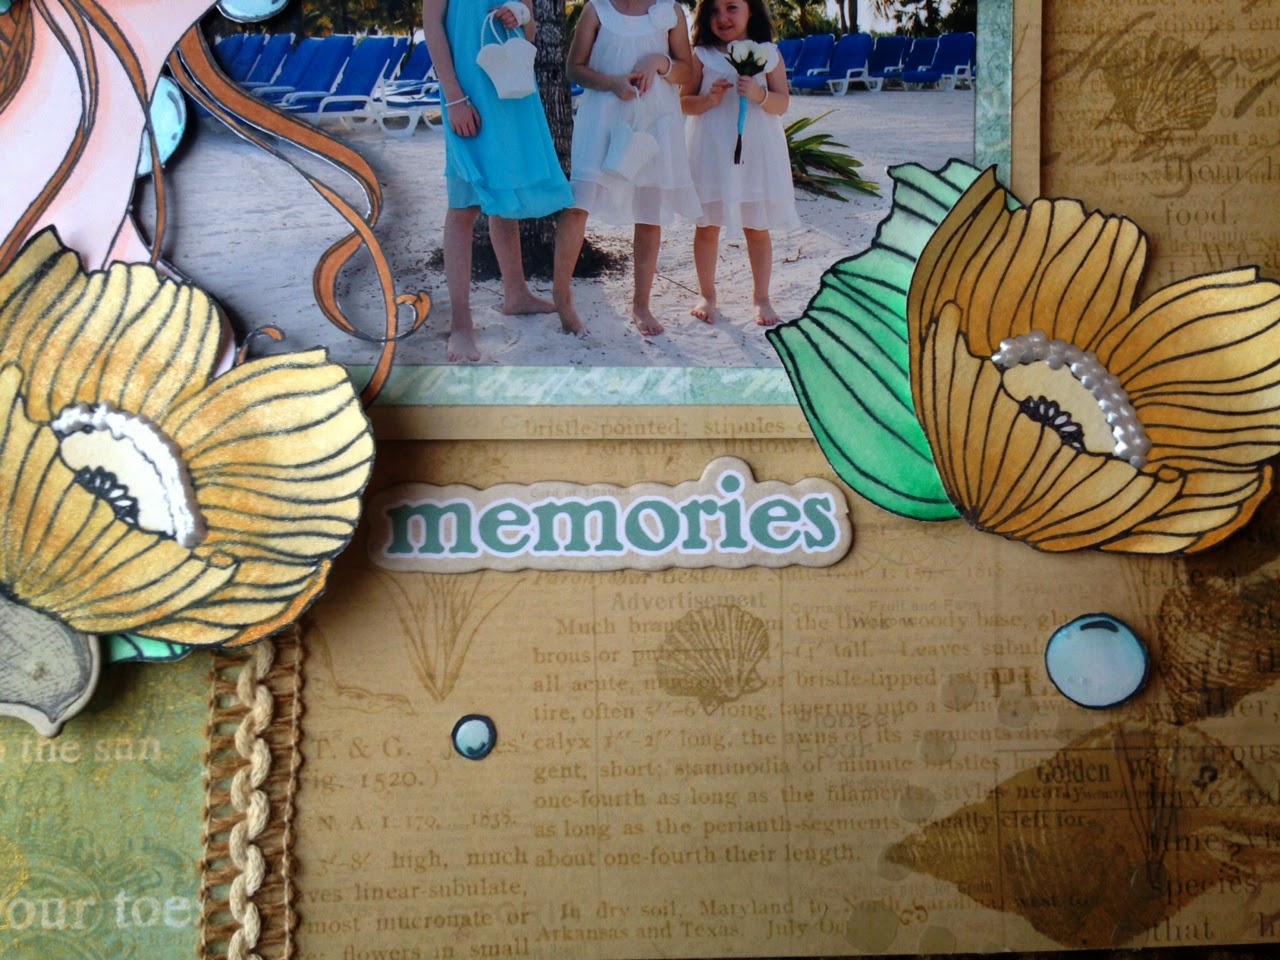
Here are some close ups of the finished project:


and of the bottom...


I love that sweet, secret little surprise! 

So now that YOU know how easy it is...how about you share your own creations with us on the Bloom Girls Creative Group on Facebook ? We'd love to see. :) 

Here is the list of products that I used:

Prima:
Prima Bloom Girl Stamp (Jamie Dougherty Designs):  Paige– 980554
Color Bloom Sprays:   Vintage Metal – Gold Foil – 573805, Tangerine – 573935, Soft Teal - 573782
Prima Stencil:  Bubble - 960445
Prima Flowers:
*Cartographer Adventurer – 574529
*Bloom Radiant Petals – 575205
*Bloom Freshly Picked – 575212
*Bloom Sunkissed - 575182
Paper: Coffee Break – 846985
Trim - 573614

Other:
Ranger Archival Ink – Coffee
Faber-Castell Design Memory Craft®:  PITT Artist Stamper’s Big Brush Pens – Black (199), Warm Grey IV (273), Nougat (178), Permanent Green Olive (167), May Green (170), Magenta (133). Texture Luxe – Gold, Pearl. Texture Gems – Gold, Clear. Gelatos® - Metallic Mint, Metallic Melon, Butter Cream.  Gel Medium. 


Thursday, January 8, 2015

Altered Frame with Courteney!

Let's make something old, new again!!!! I was going through a few older items my mom had given me to Alter and I came across this Gold frame that I thought would work out perfectly for this project!


I added some sparkly gold paper to the frame and started layering!
Jamie's amazing NEW "Floral" stamp is absolutely stunning and comes with 3 different size flowers. Plus they can be colored to match any project!!!


Once I adhered the biggest of the flowers in the "Floral" stamp set I started layering the smaller ones. Putting Jamie's NEW "Emily" Bloom Girl right in the middle!!! I absolutely
Love the Steampunk glasses and gears that surround here. She is so beautiful and so much fun to color!!


I am so very excited for everyone to see and play with all of the Amazing NEW Bloom Girl stamps and stencil!!!
Xoxo
Courteney McMillan-Gibson

Wednesday, January 7, 2015

Bloom Girl Sophie Layout :) :) :)

Hello Hello fellow Bloom Girl Fans :)

Today I would like to share with you a very simple layout that still has visual impact because of its simplicity. I have also included a quick and simple pictorial step out of how I created it :) :) :)


For this layout I have used the beautiful Bloom Girl Sophie 


Step out :)

To begin I stamped with embossing ink the Sophie image on 2 peices of pearl white card stock, on one I did a simgle image and on the second I did multitple images for the fussy cutting.


I emboss the stamped images I used black embossing powder.


Heat set all of the embossed images with a heat gun.


I higlight the pattern on the white resin frame and to coordinate it to the stamped image I used a black ink pad.


Next grab a freash cup of coffee and begin your fussy cutting.


Once the cutting has been done adhere your photo and the resin frame in position


Then start layering up the fussy cutting, I have used both adhesive dimensional foam dots and clear drying glue for this.


I then added some splats of black paint to help soften the 'white space', and then completed the final embellishing.


Well that is it for me for the moment, I do hope you enjoy this share.

Cheers and Happy Bloom Creating :) :) :)