Showing posts with label stamping. Show all posts

Friday, November 14, 2014

Pocket Page Inserts by DT Louise :) :) :)

Hello Hello Fellow Bloom Girl Fans :)

Today I would like to share with you some pocket page inserts that I made using the wonderful Bloom Collection Cling Stamps from the Insta Chic range :)

I have created the 3 main sizes of 6 x 4, 4 x 4, and 3 x 4 inch.

If you click on the images they are linked to product pages for Prima Marketing :) :) :)


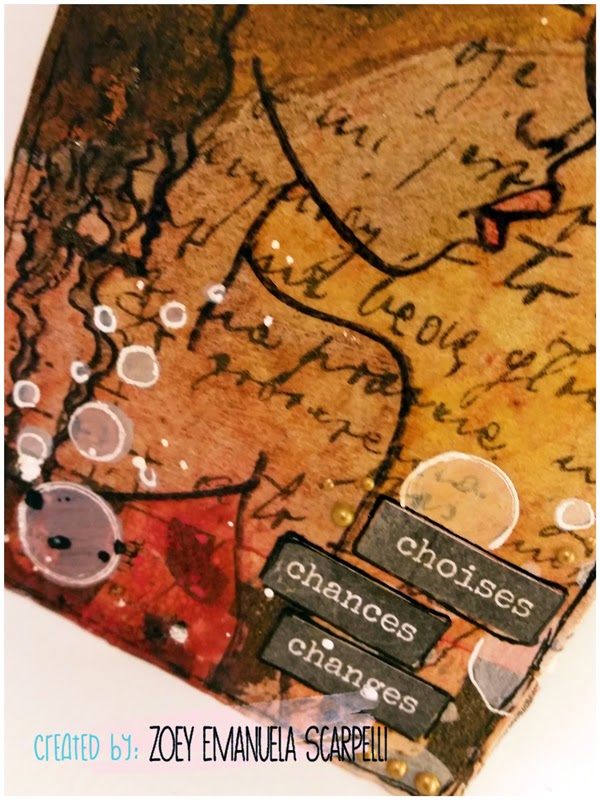
so love these Instachic range of Bloom Girl Stamps, they are just the perfect size for the 6 x 4 inserts. I have white heat embossed these using a fine embossing powder, on a painted background.


The Bloom Collection metal flowers are just the perfect touch!!! :)


For these 4 x 4 inserts I have done some fun resist embossing with water colour paints. 


These are the new release Bloom Collection Metal Flowers that I have used to embellish the inserts I so so luuuurve them :) :) :)


Other products that I have used are;
  • Cardstock
  • Distress paint
  • Water colour paint
  • Felt tip pen 005
  • Adhesive rhinestones
  • Embossing ink and powder
Well that is it for me for the moment, I will be back later in the month with more of my creative fun with the Awesome Bloom Collection! :) :) :)

Tuesday, November 11, 2014

Welcome our Guest Designer Zoey!!!!

Hello beautiful people!
Zoey's here to bring you my very first post! We will make a Tag today, something that lately is something that I really enjoy doing!
I started off by coloring my background using Gelatos by Faber-Castell Design Memory Craft , I blended the color using my fingers and then I added some stamps using Prima Clear Stamps.


I kept adding texture to the background and then I finally stamped this amazing Bloom Girl : Hope.
I love that stamp. I love to imagine stories behind her eyes, I love to imagine what she is thinking right now and what she is looking at. I love daydreaming while I create, you will learn to know me! LOL. Anyway, after I stamped her with Archival Ink, I started adding colors.
I know nothing about coloring, but, I try to add a bit of color anyway to my creations!


 Here's a photo after few coloring steps. Yes I know, not perfect but...hey! Perfection is boring, right?! ehehe
As you might notice, I did not color the flower in her head -- you will know why in the next step!


I stamped again -- this time only the flower , and added more color. I used distress markers to color both Hope and the flowers. After coloring the flowers, I cut them in few pieces.
I will later add the flowers to create some dimension.


Since the background was not enough filled, I decided to use this Prima stencil (Orbs) and with the Faber-Castell Pitt Artist Pen in white, I colored the circles.


The only thing I did after the ink dried, I added few details, colored her eyes and lips and added stickers to create my sentiment.


I hope you will like the result, as always for any comments, questions, suggestions please leave a comment!
Stay happy , Stay creative... till next time!
CIAO Zoey

Tuesday, November 4, 2014

Watercolor Bloom Girl Window with Lisa


Hey everyone! Happy Tuesday. It's Lisa with you again. (Didn't I just see you all?) And I have a very, very cool card to share with you today. I am in LOVE with how this turned out. I started to make something else twice, and then I saw THESE resin pieces and a little light clicked in my head and I knew exactly what to make.

Here she is:


My heart goes pitter-patter when I look at her. I wish you all could see her in real life.

Here's what I did to create this beauty. I stamped the Karlie Bloom Girl in Archival Black Ink on watercolor paper. Then I took the resin frame and figured out what part of her I wanted to be "in color" and traced inside of it.. Everything within the frame would be color, and everything outside the frame would be black and white.

Now, I could have taken a very easy road and just colored the inside of the frame and left the outside as is, but it would have looked very flat. So, the entire thing IS watercolored. ALL OF IT. Yes, there are many shades of greys, blacks, whites, silvers, etc. It was challenging, but fun. Especially her face! I added bits of Wink of Stella in clear to really make it shimmer and shine. Oh! I also added some enamel accents in black and white in a few areas, as well. It's very dimensional.


This card was so easy to make. Here is my very short supply list if you want to make one for yourself:

a) Karlie Bloom Girl Stamp
b) Watercolor Pencils
c) Resin Frame
d) Watercolor paper
e) Colored Cardstock
f) Foam Adhesive
g) Strong glue for adhering frame
h) Water & Paintbrush
i) Standard adhesive
j) Wink of Stella Pen
k) Black & White Enamel Accents

That's IT!! Anything else that you add is up to you. You certainly don't even need the last two on the list. I hope that you enjoyed it and I look forward to seeing all of your creations on the Bloom Girl Creative Group on Facebook.


Monday, October 13, 2014

October Challenge with DT Lisa


Hi everyone! It's Lisa here with you today and I'm bringing you my take on the October Challenge. Have you played along yet? You have all month long to participate! Just grab your fave Bloom Girl and get going. Here's the inspiration photo (as a quick reference) :


Current Challenge

And here's my take on the challenge photo. I used the same Bloom Girl stamp (Jing) and the colors:


What I did was to stamp her on black paper and heat emboss in white. Then I colored her in using pastel pencils. I added some highlights on the flowers using Viva Decor Precious Metal Color in Lilac and Copper. Her hair was darkened using Wink of Stella in black. And her lips and her one (showing eye) were glossified (hahha!) using Glaze. Oh! I also changed the color of the one purple flower. It WAS white. ;) Sneaky, huh? I just used a PITT Artist Stamper's Big Brush Pen to do that. The metal embellishment was painted with lime green acrylic paint then dabbed with black acrylic paint on top. Fun card that's easy to recreate.


Easy right? I always love seeing what everyone else creates during these challenges. I hope that you enjoy what WE create too and can see how easy it can be. 

HAPPY MONDAY!


Wednesday, September 10, 2014

Some Gardenia Bloom Girl creativity with DT member Louise :) :) :)

Hello Hello fellow Bloom Girl Fans :)

Today I would like to share with you a layout that I created using the fabulous new release Bloom Girl Stamp - Gardenia

To create a simple background pattern to compliment my black and white photo I have quite simply heat embossed the stamped image. To add a highlight with a difference I have swiped/brushed a band of purple Color Bloom spray mist across the face of the stamped image. I have colour coordinated the resin frame with the same spray mist.

To draw the eye to the framed photo I have adhered/clustered  some gorgeous black glass beads, sequins and resin flowers around the frame, along the sweeping line of the Bloom Girls  flowing hair. Tendrils of black cotton thread extend out from this clustering of embellishments and are made to look like an extension of the Bloom Girls hair.


Technique Tip: to adhere the glass beads I have applied Glossy Accents in and around the resin frame, sprinkled on the glass beads, allowed it to partially dry, and then gently shaken off the excess beads not adhered.


As you can see from these two close up photos I have higlighted the pattern of the resin frame. I have done with with a black ink pad.

So Bloom Girl Fans that is it from me for the moment, I do hope you are enjoying the Creative Design Teams creativity this month as much as I am :) :) :)

Cheers and Happy Creating!

Louise :) xxx


Friday, July 18, 2014

Welcome the 2014 Bloom Girl Design Team

First off I'd like to thank everyone who sent in applications for the design team call. I was so blown away by the talent and am so grateful so many of you showed interest. We wanted to have so many of you on the team but we could only choose a few.

Now lets welcome our new team to the first ever Bloom Girl Design Team! They will be representing the Bloom Collection created by Jamie Dougherty Designs for Prima Marketing Inc. We have a very creative, talented group of ladies to introduce.


Here is just a peak of what is to come from these lovely ladies. 

Project by: Mindy Baxter

Project by: Stephanie Beauchemin

Project by: Louise Nelson

Project By: Wendy Morris

Thank you for joining us today and we can't wait to share this exciting new journey with all of you. 
The new Bloom Collection can now be found at your local scrapbook stores and online. 

Sample by: Jamie Dougherty

Happy Creating